こんにちは、長井です。
これは TECHSCORE Advent Calendar 2015 の14日目の記事です。
本記事ではJavaのマイクロフレームワーク「Ninja」を使って Twetter のツイートを検索する Webアプリケーションを作ります。
マイクロフレームワークとは何かについてはこちらの記事をご覧下さい。
Ninja のインストールは Maven で行います。
今回のアプリケーション作成は Linux(Arch Linux) で行いました。前提として Java, Maven がインストールされているものとします。(参考…Windows環境でのMavenインストール方法)
まずは Maven でプロジェクトを作成します。
|
1 2 |
$ mvn archetype:generate -DarchetypeGroupId=org.ninjaframework \ -DarchetypeArtifactId=ninja-servlet-archetype-simple |
幾つかパラメータ入力を促されますがここやここを参考に入力します。今回は groupId は「com.example」, artifactId は「ninjaSmp」, version, package はデフォルトのまま「 1.0-SNAPSHOT」および「com.example」にしました。
次に作成されたプロジェクト名のディレクトリに移動してコンパイルを実行しアプリケーション起動します。
|
1 2 3 |
$ cd ninjaSmp # 作成されたプロジェクト名のディレクトリ $ mvn clean install # パッケージをローカルリポジトリにインストール $ mvn ninja:run # アプリケーションの起動 |
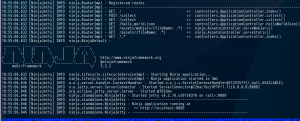
 (クリックで拡大)
▲コンパイルが完了しアプリケーションが起動したときのコンソール
「http://localhost:8080」でデフォルトのサンプルアプリケーションにアクセスすることが出来ます。
アプリケーションの作成
サンプルアプリケーションに手を加えてアプリケーションを完成させます。
以降で見るコードは手を加えた完成後のものです。
とは言っても手をいれる内容はそれほどに多くありません。
アプリケーションのディレクトリ階層は以下の様になります。Maven の標準に準拠しているのでこのまま Eclipse 等の IDE のプロジェクトとしてインポートする事も可能です。
|
1 2 3 4 5 6 7 8 9 10 11 12 13 14 15 16 17 18 19 20 21 22 23 24 25 26 27 28 29 30 31 32 33 34 35 36 37 38 |
ninjaSamp │ ├── pom.xml ├── src │ ├── main │ │ ├── java │ │ │ ├── assets │ │ │ │ └── css │ │ │ │ └── custom.css │ │ │ ├── conf │ │ │ │ ├── application.conf │ │ │ │ ├── messages.properties │ │ │ │ ├── Module.java │ │ │ │ └── Routes.java │ │ │ ├── controllers │ │ │ │ └── ApplicationController.java │ │ │ └── views │ │ │ ├── ApplicationController │ │ │ │ ├── collect.ftl.html │ │ │ │ └── index.ftl.html │ │ │ ├── layout │ │ │ │ ├── defaultLayout.ftl.html │ │ │ │ ├── footer.ftl.html │ │ │ │ └── header.ftl.html │ │ │ └── system │ │ │ ├── 403forbidden.ftl.html │ │ │ └── 404notFound.ftl.html │ │ └── webapp │ │ └── WEB-INF │ │ └── web.xml │ └── test │ └── java │ └── controllers │ └── ApiControllerDocTesterTest.java └── target ├── classes │ <以下省略> |
conf/ 以下に URL のルーティングとメッセージプロパティ、controllers/ 以下に各処理を制御するクラス(コントローラー)があります。
画面まわりのファイルはviews/以下にあります。
テンプレートエンジンとして Apache FreeMaker が利用されています。
手を加えた箇所
Routes.java
|
1 2 3 4 5 6 7 8 9 10 11 12 13 14 15 16 17 18 19 20 21 22 23 24 25 26 27 28 29 30 31 32 33 34 35 |
package conf; import ninja.AssetsController; import ninja.Router; import ninja.application.ApplicationRoutes; import controllers.ApplicationController; public class Routes implements ApplicationRoutes { @Override public void init(Router router) { router.GET().route("/").with(ApplicationController.class, "index"); // 今回追加したコード router.POST().route("/collect").with(ApplicationController.class, "collect"); router.GET().route("/collect").with(ApplicationController.class, "collect"); router.GET().route("/hello_world.json").with(ApplicationController.class, "helloWorldJson"); /////////////////////////////////////////////////////////////////////// // Assets (pictures / javascript) /////////////////////////////////////////////////////////////////////// router.GET().route("/assets/webjars/{fileName: .*}").with(AssetsController.class, "serveWebJars"); router.GET().route("/assets/{fileName: .*}").with(AssetsController.class, "serveStatic"); /////////////////////////////////////////////////////////////////////// // Index / Catchall shows index page /////////////////////////////////////////////////////////////////////// router.GET().route("/.*").with(ApplicationController.class, "index"); } } |
URL にコントローラークラスとそのメソッド名を関連付けています。今回デフォルトのサンプルアプリケーションに URL "/collect" を追加しています。
ApplicationController.java
|
1 2 3 4 5 6 7 8 9 10 11 12 13 14 15 16 17 18 19 20 21 22 23 24 25 26 27 28 29 30 31 32 33 34 35 36 37 38 39 40 41 42 43 44 45 46 47 48 |
package controllers; import java.util.HashMap; import java.util.List; import java.util.Map; import com.google.inject.Singleton; import ninja.Result; import ninja.Results; import ninja.params.Param; @Singleton public class ApplicationController { public Result index() { Map<String, Object> map = new HashMap<>(); map.put("m1", "Honour thy error as a hidden intention."); map.put("m2", "You don't have to be ashamed of using your own ideas"); map.put("m3", "Use an unacceptable color"); return Results.html().render(map).template("views/ApplicationController/index.ftl.html"); } public Result helloWorldJson() { SimplePojo simplePojo = new SimplePojo(); simplePojo.content = "Hello World! Hello Json!"; return Results.json().render(simplePojo); } public static class SimplePojo { public String content; } public Result collect(@Param("kwd") String arg1) { TwitterPojo twitterPojo = new TwitterPojo(); List<String> tweets = twitterPojo.collect(arg1); Map<String, List<String>> map = new HashMap<>(); map.put("tweets", tweets); return Results.html().render(map).template("views/ApplicationController/collect.ftl.html"); } } |
コントローラークラス。Routes.java でURL ごとに設定したメソッドの本体です。
Resultsクラスの html() メソッドが Resultクラスオブジェクトを返すので画面に引き渡したい値が格納されたオブジェクトとテンプレート名を渡します。Resultsクラスの json()メソッドで JSON 形式のレスポンスを生成する事が出来ます。
メソッドの引数に @Param アノテーション指定すると、リクエストパラメーターとして取得します。
アノテーションにはValidation用のものも用意されています。(@Required や @isInteger 等)
Validation としてJSR 303 Bean Validationを利用する事も出来ます。(使い方は下記のリンク先参照)
アプリケーションのURL”/collect”にアクセスされた時はTwitterのツイートを検索するクラス(TwitterPojo)を呼び出しています。
TwitterPojo.java
|
1 2 3 4 5 6 7 8 9 10 11 12 13 14 15 16 17 18 19 20 21 22 23 24 25 26 27 28 29 30 31 32 33 34 35 36 37 38 39 40 41 42 43 44 45 46 47 48 49 50 51 52 53 54 55 56 57 58 59 60 61 62 63 64 65 66 67 68 69 |
package controllers; import java.util.ArrayList; import java.util.List; import java.util.StringJoiner; import java.util.StringTokenizer; import com.google.common.collect.Lists; import twitter4j.Query; import twitter4j.QueryResult; import twitter4j.Status; import twitter4j.Twitter; import twitter4j.TwitterException; import twitter4j.TwitterFactory; import twitter4j.auth.AccessToken; public class TwitterPojo { List<String> collect(String param) { if (param == null || param.length() == 0) { return Lists.newArrayList(); } Twitter twitter = new TwitterFactory().getInstance(); String acsToken="{ACCESS_TOKESN}"; String acsTokenSecret="{ACCESS_TOKESN_SECRET}"; AccessToken accessToken = new AccessToken(acsToken, acsTokenSecret); String oauthCon ="{CONSUMER_KEY}"; String oauthConSec= "{CONSUMER_SECRET}"; twitter.setOAuthConsumer(oauthCon, oauthConSec); twitter.setOAuthAccessToken(accessToken); Query query = new Query(); query.setQuery(param); QueryResult result = null; List<String> ret = new ArrayList<>(); // Max 1500 tweets for (int i = 1; i <= 15; i++) { try { result = twitter.search(query); } catch (TwitterException e) { e.printStackTrace(); } for (Status tweet : result.getTweets()) { String str = tweet.getText(); StringJoiner sj = new StringJoiner(":", "[", "]"); String u = tweet.getUser().getName(); sj.add(u); StringTokenizer sta = new StringTokenizer(str); while (sta.hasMoreTokens()) { String wk = sta.nextToken(); if (wk.indexOf("#") == -1 && wk.indexOf("http") == -1 && wk.indexOf("RT") == -1 && wk.indexOf("@") == -1) { sj.add(wk); } } ret.add(sj.toString()); } if (result.hasNext()) { query = result.nextQuery(); } else { break; } } return ret; } } |
Twitter を検索する為に Twitter4J を使っています。
このライブラリを使うと簡単に TwitterAPI 経由でツイートを取得する事が出来ます。
画面まわり
index.ftl.html
|
1 2 3 4 5 6 7 8 9 10 11 12 13 14 15 16 17 |
<#import "../layout/defaultLayout.ftl.html" as layout> <@layout.myLayout "Home page"> <h1>${i18n("hello.world")}</h1> <ol> <li>${m1}</li> <li>${m2}</li> <li>${m3}</li> </ol> <br/> <br/> <br/> <p>${i18n("hello.world.json")}</p> <a href="/hello_world.json">Click</a> </@layout.myLayout> |
トップ画面です。
コントローラクラスで設定した値を表示しメッセージはプロパティファイルから取得(${i18n("...")})しています。
デフォルトのサンプルアプリケーションのメッセージを少し変更しています。
collect.ftl.html
|
1 2 3 4 5 6 7 8 9 10 11 12 13 14 15 16 17 18 19 20 21 22 23 |
<#import "../layout/defaultLayout.ftl.html" as layout> <@layout.myLayout "Home page"> <h1>${i18n("hello.collect")}</h1> <form method="POST" action="/collect"> <input type="text" value="" name="kwd" placeholder="${i18n("keyword.hint")}" size="25" /> <input type="submit" value="collect tweets"/> </br> </br> <table> <#list tweets as tweet> <tr><td>${tweet}</td></tr> <#else> <tr><td>0 item</td></tr> </#list> </table> <br/> <br/> <p>${i18n("hello.world.json")}</p> <a href="/hello_world.json">Click</a> </@layout.myLayout> |
Twitter の検索ワードを入力するフォームと結果の表示領域です。
Message.properties
|
1 2 3 4 5 6 |
header.title=TweetCollector header.home=Home hello.world=Ninjaで作った画面にようこそ。 hello.world.json=Jsonで出力 hello.collect=聞いてみよう。 keyword.hint=検索したい単語を入力してください |
画面に表示するメッセージを記載しています。
Webアプリケーションにアクセスする
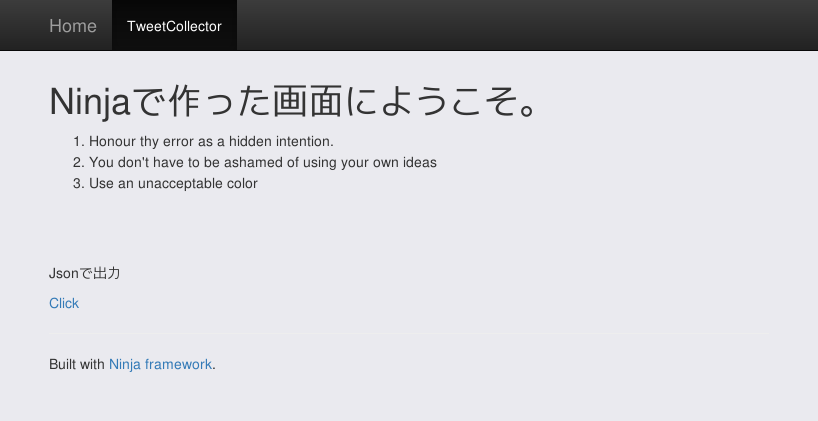
ホーム画面

ApplicationControllerで指定された値が表示されています。
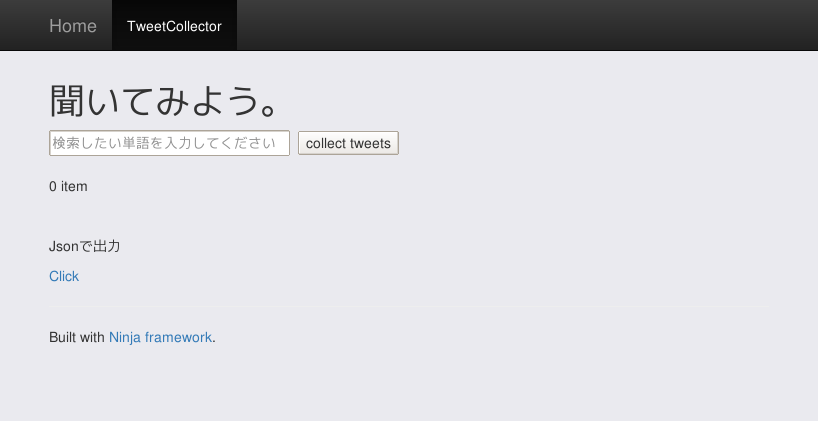
Tweet 検索画面
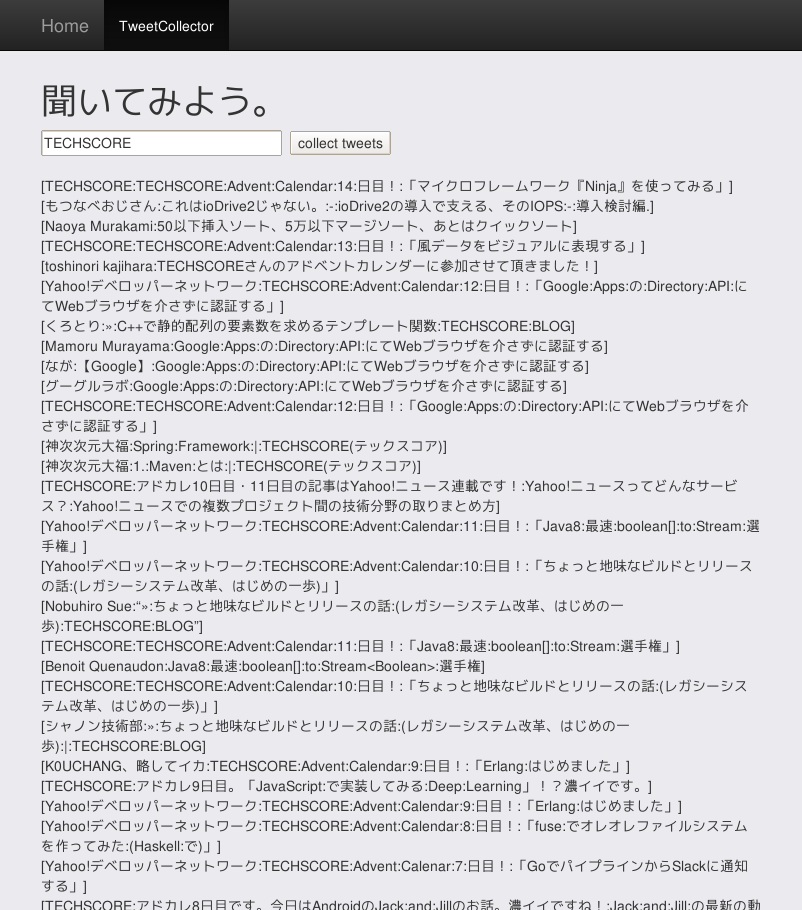
Tweet 検索画面(結果表示)
まとめ
Ninja はフレームワークとして軽量化が図られているのでインストールするまでに要する時間は数分でした。
ワンアイデアを Webアプリケーションですぐに動かして見たい時に準備に時間がかからないという事は重要です。
迅速かつ簡単にアプリケーションを構築できるマイクロフレームワークには他にも「Spark」「Slim」等があり一つのトレンドになってきているのかも知れません。
それでは!


